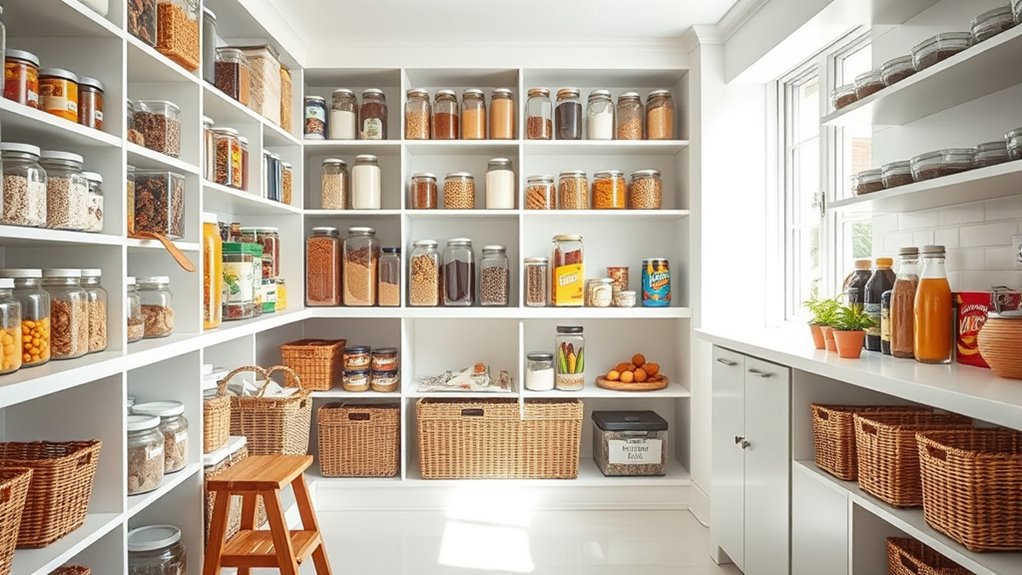
10 Tips to Organize Kitchen Pantry Efficiently
Struggling to keep your kitchen pantry neat and accessible? You’re not alone. Many people find it challenging to organize their pantry efficiently, leading to wasted space and expired food. If you’ve ever opened your pantry only to feel overwhelmed by the clutter, these 10 tips to organize your kitchen pantry efficiently are here to help.
Start by sorting and decluttering, tossing expired items and grouping similar goods together. Use clear containers and label everything for easy visibility and quick access.
Adjust shelving to fit your tallest items and add baskets or lazy Susans for small goods.
Store frequently used items at eye level and rotate stock using the FIFO method to keep food fresh. Regularly check inventory to avoid waste. Follow these steps, and you’ll uncover even more ways to maintain an efficient pantry.
Organize Kitchen Pantry Key Takeaways
- Sort and declutter pantry items by discarding expired goods. Group similar products together for easy access.
- Use clear containers and labels to boost visibility. This helps you quickly identify what’s inside.
- Maximize space with adjustable shelving, vertical stacking, pull-out shelves, and door racks.
- Store frequently used items at eye level. Use baskets or lazy Susans for small goods to keep things organized.
- Keep items fresh by rotating stock using FIFO. Check expiration dates regularly and do weekly inventory reviews.
Sort and Declutter Your Kitchen Pantry First
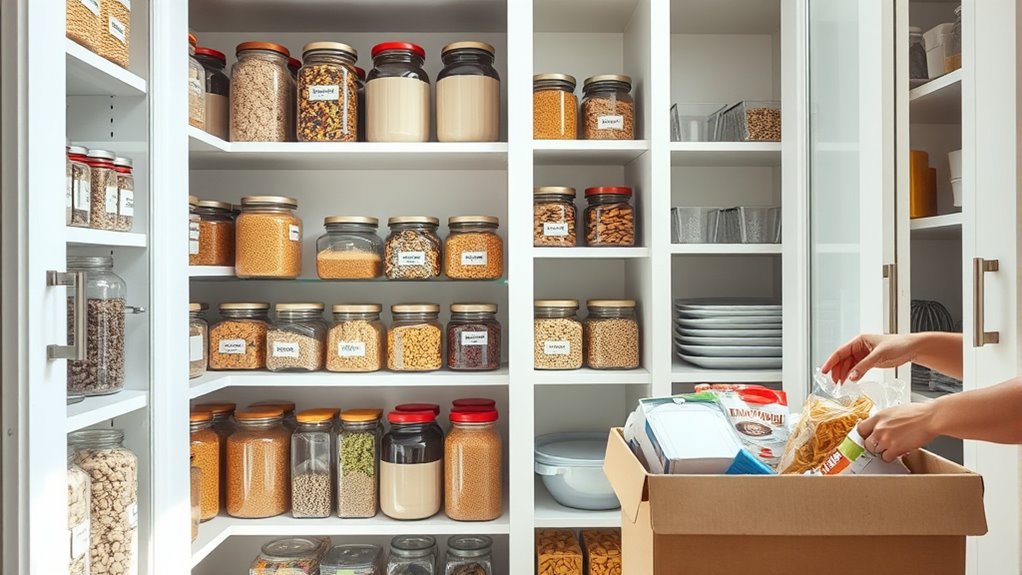
Before you reorganize, you need to sort and declutter first. Start by emptying all the shelves to see exactly what you have. Toss expired items and donate anything you won’t use. This clears space and makes it easier to organize.
Next, group similar items together, such as baking supplies, canned goods, and snacks. Use container organization to keep small or loose items neat, preventing spills and messes.
Once everything is sorted, add shelf labeling to clearly mark where each category belongs. Labeling not only helps you maintain order but also lets everyone in your household find what they need quickly.
Use Clear Containers for Easy Visibility
Using clear containers makes it so much easier to see what you need right away. You won’t have to dig around, which saves time and helps prevent food from going bad. Plus, it just looks neater!
Try to choose container sizes that fit your usual pantry items. That way, you can make the most of your space and keep everything organized. It’s a simple change, but it really can make your pantry work better and look great too.
Benefits of Clear Containers
When you choose clear containers, you make it easier to spot what you need at a glance. This not only saves time but also helps you keep track of your supplies, reducing food waste.
Clear containers offer great aesthetic appeal by creating a clean, uniform look that makes your pantry feel organized and inviting. You’ll appreciate how they showcase your ingredients neatly, encouraging you to maintain order.
Moreover, container durability plays a vital role. Opting for sturdy, high-quality clear containers ensures they withstand daily use and won’t easily crack or stain.
This durability means you won’t have to replace them frequently, making clear containers a smart, long-lasting investment for an efficient pantry setup.
Choosing the Right Sizes
Clear containers not only keep looking tidy but also help you quickly identify what’s inside. When choosing container sizes, think about the types and quantities of items you store most often.
Opt for smaller containers for spices or baking ingredients, and larger ones for staples like flour or pasta. Selecting the right container sizes maximizes storage efficiency by reducing wasted space.
You’ll avoid overcrowding shelves or leaving awkward gaps that clutter your pantry. Plus, uniform containers stack neatly, making everything easy to access.
Label Pantry Items to Find Them Quickly
Although it might seem like a small step, labeling pantry items can save you a lot of time and frustration. Using clear labeling techniques helps you spot what you need quickly, especially when combined with color coding.
Assign colors to item categories, like red for spices or blue for baking essentials, so your eyes instantly know where to look. This system cuts down on searching and keeps your pantry orderly.
Here’s a simple guide to labeling techniques with color coding:
| Item Type | Label Style | Color Code |
|---|---|---|
| Spices | Small stickers | Red |
| Baking Goods | Chalkboard tags | Blue |
| Snacks | Printed labels | Green |
| Canned Items | Magnetic labels | Yellow |
Group Pantry Items by Category for Efficiency
You’ll save time when you group similar items together—think snacks, baking supplies, or canned goods. It’s so much easier to find what you need when everything’s in one spot. Plus, clear labels make it a breeze to spot items without digging through everything. This simple step keeps your pantry efficient and easy to navigate.
Categorize Similar Items
When you group similar items together, finding what you need becomes much faster and easier. Start by categorizing items based on their use or type. This approach helps you avoid rummaging through random shelves and keeps your pantry tidy.
For example, organizing utensils in one section prevents clutter and speeds up meal prep. Likewise, managing cleaning supplies separately ensures safety and accessibility.
Focus on these categories to streamline:
- Baking goods like flour, sugar, and baking powder
- Snacks and canned goods for quick access
- Organizing utensils and managing cleaning supplies in distinct zones
Use Clear Labels
Clear labels transform by making it easy to spot exactly what you need at a glance. To maximize efficiency, use clear labels that stand out and are easy to read.
Investigate different labeling techniques like chalkboard tags, printed stickers, or handwritten notes on masking tape. Choose container materials such as glass, plastic, or metal that best suit your pantry style and durability needs.
Transparent containers paired with clear labels help you quickly identify contents without opening each one. Group similar items under consistent label designs for a cohesive look.
Remember to update labels regularly as you restock or change items, keeping your system accurate. With clear labeling, you’ll save time, reduce waste, and maintain an organized pantry effortlessly.
Adjust Shelving to Fit Your Pantry Items
Although pantry items come in various shapes and sizes, adjusting your shelving guarantees every item fits neatly and stays accessible. When you adjust shelving, you tailor your pantry to your specific needs, making shelf customization essential.
Adjusting your shelving ensures every item fits perfectly and remains easy to reach.
Start by measuring your tallest items and set shelves accordingly to avoid wasted vertical space. Remember, flexibility is key. Customizing shelf heights means you can store everything from cereal boxes to large containers without clutter.
To optimize shelf customization, consider these tips:
- Group items by size and frequency of use.
- Leave space for future additions or bulk purchases.
- Use adjustable shelving brackets for easy changes.
Use Door and Wall Space for Extra Storage
You can free up a lot of shelf space by adding racks to your pantry door. And don’t forget about the vertical wall space—it’s perfect for hanging baskets or hooks to keep items within easy reach. These simple additions make it easier to stay organized without crowding your shelves.
Maximizing Door Rack Potential
When pantry shelves start to feel cramped, turning the inside of your door into a storage zone can open up valuable space. Door rack organization is a smart way to maximize storage without crowding your main shelves.
By maximizing door storage, you can keep smaller items within easy reach and free up shelf space for bulkier goods. Consider these tips to get the most from your door racks:
- Install adjustable racks or pockets to customize storage according to your needs.
- Use clear containers or labeled bins to keep items visible and organized.
- Store frequently used items like spices, snacks, or small jars on the door for quick access.
This approach transforms underutilized space into a functional, accessible part of your pantry, helping you maintain order and efficiency.
Utilizing Vertical Wall Space
Maximizing door racks is just one way to reclaim space, but the walls offer even more opportunity for storage. You can install wall-mounted organizers to keep spices, snacks, or small containers neatly arranged and easy to access.
Hanging storage solutions like hooks or baskets allow you to store items vertically, freeing up shelf space below. Consider adding a pegboard or slim shelving units to hold utensils or canned goods.
These options not only maximize unused vertical space but also keep your pantry tidy and efficient. By using your pantry walls effectively, you create more room without overcrowding shelves, making it simpler to find what you need and maintain order daily.
Don’t overlook this valuable space; it’s a game changer for pantry organization.
Incorporate Lazy Susans and Baskets for Small Goods
Although small pantry items can quickly create clutter, incorporating Lazy Susans and baskets helps keep everything accessible and tidy. Lazy Susans let you spin and find spices, sauces, or small jars easily, which saves you from frustration and wasted time.
Meanwhile, basket organization groups similar items together, making your pantry look neat and simplifying restocking.
To maximize your pantry’s efficiency with these tools, consider these tips:
- Use Lazy Susans for round containers, spice jars, and condiment bottles so you can reach everything without removing items.
- Choose baskets of varying sizes to categorize snacks, baking supplies, or packets to prevent small items from scattering.
- Label baskets clearly to maintain order and avoid confusion during busy cooking moments.
Store Frequently Used Items at Eye Level
Since you reach for certain ingredients more often than others, storing frequently used items at eye level saves time and reduces frustration. When you organize your pantry this way, meal planning becomes quicker because you can easily spot staples that support nutrition balance.
Keep everyday essentials like oils, spices, and grains right where you can grab them without bending or stretching.
Here’s a simple layout to help you decide which items to keep at eye level:
| Item Type | Examples |
|---|---|
| Cooking Oils | Olive oil, Coconut oil |
| Spices & Herbs | Basil, Cinnamon, Pepper |
| Grains & Pasta | Rice, Quinoa, Spaghetti |
| Snacks | Nuts, Granola bars |
| Everyday Canned Goods | Beans, Tomatoes |
Rotate Pantry Stock to Keep Food Fresh
To keep your pantry items fresh and reduce waste, you should rotate your stock regularly. Pantry rotation ensures that older items are used before newer ones, preventing food expiration and saving you money. When you bring new groceries home, place them behind the older items on the shelf. This simple habit makes it easier to spot products nearing their expiration date.
Regularly rotate your pantry by placing new items behind older ones to keep food fresh and reduce waste.
Here are some quick tips to master pantry rotation:
- Use the “first in, first out” (FIFO) method to prioritize items.
- Label shelves or containers with expiration dates for easy tracking.
- Regularly check for expired items and discard them promptly.
Keep Your Pantry Fresh With Weekly Inventory Checks
Keeping your pantry fresh starts with weekly inventory checks that help you stay on top of what you have and what you need. Each week, take a few minutes to scan your shelves, noting items nearing their expiration dates. This habit prevents food waste and guarantees you use products while they’re still fresh.
When you spot anything close to expiring, plan meals around those ingredients or set them aside for quick access. Regularly checking your pantry supports effective food preservation by helping you avoid overstocking and spoilage.
It also lets you identify any damaged packaging or pests early, preserving the quality of your stored goods. Keep a simple checklist or use an app to track inventory, making your checks faster and more accurate.
Frequently Asked Questions
How Often Should I Deep Clean My Kitchen Pantry?
You should deep clean your kitchen pantry at least once every three months to keep things fresh and organized. Sticking to a regular cleaning schedule helps prevent pests and expired items from piling up.
Use storage tips like clear containers and labeled bins to make the process easier and keep everything visible. Between deep cleans, quickly wipe shelves and check for spills to maintain a tidy pantry without much hassle.
What Are the Best Materials for Pantry Shelves?
You’ll want to choose shelf materials that offer great shelf material durability and resist moisture well. Solid wood or plywood with a moisture-resistant finish works nicely because it’s sturdy and handles humidity without warping.
Metal shelves with a powder-coated finish also provide excellent durability and moisture resistance, making them easy to clean. Avoid particleboard since it can swell when wet.
Picking moisture-resistant shelving keeps your pantry shelves lasting longer and looking good.
Can I Store Spices Together or Separately?
You can store spices together, but it’s smart to organize them by type or usage for easy access. Effective spice storage means grouping similar spices, like baking spices, herbs, or frequently used ones, so you don’t waste time searching.
Using labeled containers or a spice rack helps maintain your spice organization and keeps everything visible. Avoid storing spices near heat or moisture to preserve their flavor longer.
How Do I Prevent Pests in My Pantry?
You can prevent pests in your pantry by using pest-proof containers to store all your dry goods. These airtight containers keep bugs out and preserve freshness.
Moreover, don’t forget natural repellents like bay leaves or cloves. They’re great at deterring insects without chemicals.
Regularly clean your pantry, check for spills, and toss expired items. Taking these steps helps you keep your pantry pest-free and your food safe.
What Lighting Is Ideal for a Kitchen Pantry?
You want LED lighting for your kitchen pantry since it’s energy-efficient and provides bright, clear light that helps you spot everything easily. Installing motion sensors is a smart move, too. They turn the lights on automatically when you open the door and off when you leave, saving energy and making your pantry more convenient to use.
This combo keeps your pantry well-lit without wasting electricity or requiring extra effort.
Conclusion
Organizing your pantry might seem overwhelming, but once you start, you’ll see how simple it can be. Using clear containers and labels helps you spot what you need instantly, so no more digging around.
Imagine opening your pantry and everything’s right where it should be, grouped, visible, and easy to reach. With just a bit of effort, you’ll save time, reduce waste, and enjoy a kitchen that works for you every day.
These 10 tips to organize kitchen pantry efficiently will make your cooking space more functional and enjoyable.